Having your own personal actor website is very important in the times we’re living in. As a producer, the impact of casting those with a personal brand and influence is getting more and more common. Of course, you need talent, but the truth is we also look at your overall brand This: means social media following, video content… and the first place we usually look; your website.
Acting is not a typical job, you’re gigging always have a time stamp on them, and so it’s critical to have a home base. An actor website should be a living-digital resume for your work and a place to highlight all the reasons why we should cast you. It’s a powerful way to collect useful information such as headshots, resume, press, photos, acting reels, etc. Having a database of ‘all things you’ is extremely helpful for any producer, casting agents, managers, etc. We’ll touch more on the things you should include on your site later, but first, let’s cover the setup.
Note: This is an in-depth guide on setting up your actor website and is broken down into two main parts, with steps in each.
PART 1: Setting up & Building Your Website. PART 2: What content you should include in your site.
Part 1: Setting Up & Building Your Actor Website
How do I even get started setting up my site anyway?
I’m sure many of you have said “I should really set up a website,” only to realize you have no idea where to get started. Well, that’s where I come in here. Many platforms make building your website a LOT easier. These platforms are known as “drag-and-drop” builders. Think of it as dragging a block of content onto a page, instead of coding it with numerous symbols and numbers. If you want an image somewhere specific on your site, drag the image block in place and upload your desired picture from your computer.
For this tutorial, we will be using the popular site builder WIX
A quick note: There are other sophisticated platforms out there such as WordPress, but they require more skill and attention. For a basic actor portfolio website, Wix offers everything you need, and it’s very easy to use. You will get your site set up much more quickly using a builder like WiX.
Building Your Actor Website Step 1: Choose A Website Builder And Signup
As mentioned, we will be using Wix as an example, and what I recommend for those with no previous web building experience. It’s also cheaper, $11 per month will give you access to your own unique domain name and remove all the Wix branding ads, so your site looks professional.
First, you will want to signup for an account at WIX HERE
Click the start now button and fill out the details for creating a new account. Next, a ‘create your website’ button may appear.
You then may be prompted to choose what kind of site you want. I recommend hitting the ‘Portfolio & CV’ tab.

Then click the choose a template button.

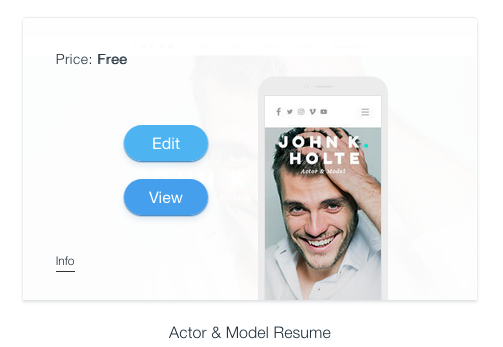
After this, you will be asked to choose your theme. Don’t worry, you can always change it later, but for this example, we will be using the ‘Actor & Model’ template. Any theme will do.
Choose the ‘Edit’ option. At this point, your site will load and be ready for editing. Now all you have to do is replace the content with your very own using the drag-and-drop editor. BUT first, there is another critical step. Keep your Wix window open as I explain step 2.
Step 2: Adding your personalized domain name to the website
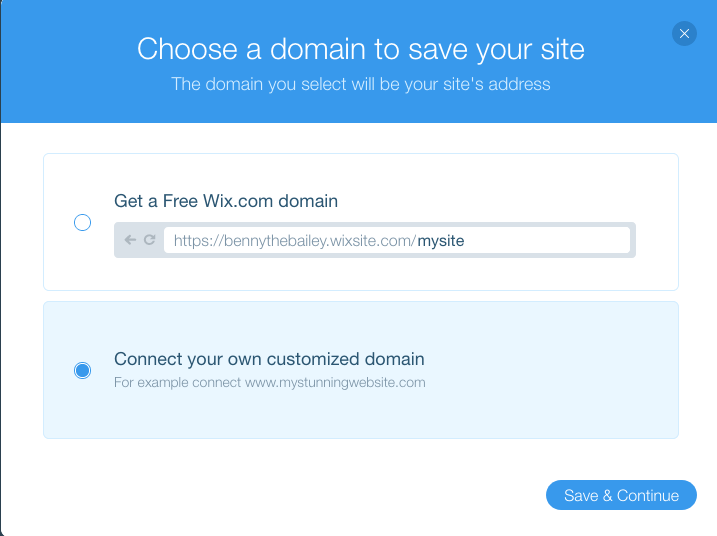
With the Wix template open, click save in the upper right-hand corner. This will prompt another window.
Hit the ‘Connect your own customized domain’ tab and continue.
Then click the ‘Get a new domain’ tab.
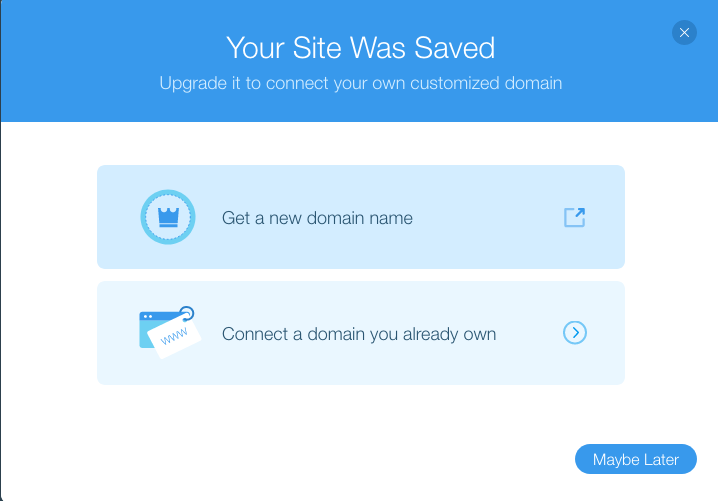
The great news here is Wix has their own ability to sell you a custom domain name, and they’re cheap. You can choose a domain and connect it to your site all on the same platform.
This is the part where you pay for a premium hosting plan. This is a monthly fee for keeping your website online. No matter what platform you use, a hosting fee is always applied. Wix has some of the cheapest plans out there.
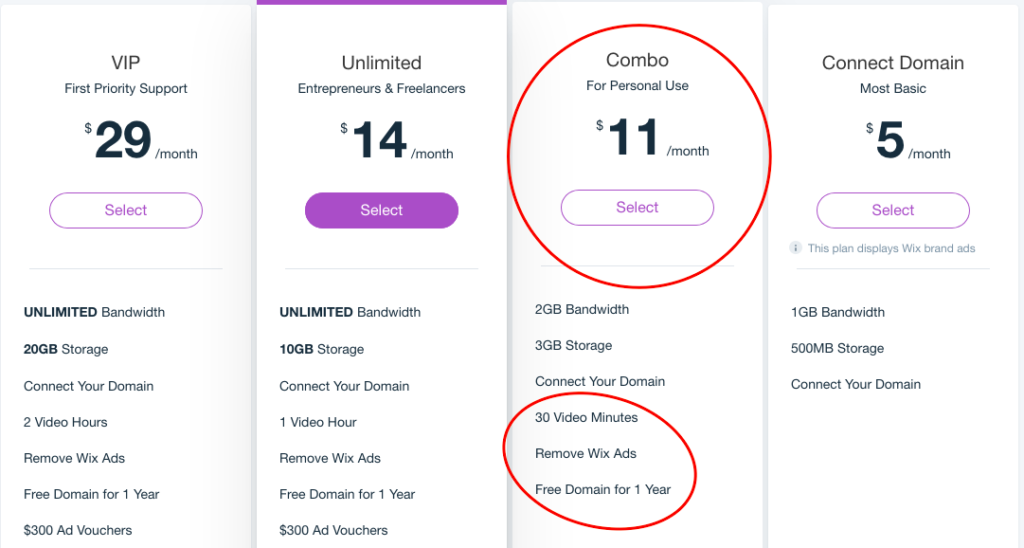
You will want to choose the ‘Combo,’ currently priced at $11/month if you pay a year in advance or $14.50 if you pay monthly.
The benefits of this plan, as opposed to the cheapest plan, are:
- Removal of Wix branding so your site looks professional
- The Combo plan also comes with a FREE domain for one year (for yearly plans only)
- 30 Minutes of video content which is essential for reels and any other video you might want to feature on your site.
Side-Step: Let’s take a second to talk about the importance of a domain name
Having your own domain name is crucial for completing a professional looking website. What is a domain name? A domain name is the URL (or web address) that your site lives on. IE: theatrenerds.com.
Wix offers a free URL, but it includes Wix in the title which doesn’t accomplish a professional look. Here are the examples of the two:
A free Wix URL: www.benbaileyaccount.wixsite.benbailey
VS.
Your own custom domain: benbailey.com
So what name should you choose? If you’re creating a personal brand site, I suggest keeping it simple and straightforward by using your first and last name, IE benbailey.com. What happens if your domain is already taken by someone else?
Here’s a few tips:
- Try using the first letter of your middle name (or maybe even your entire middle name depending on length and readability). IE benjbailey.com
- If the .com version is not available, choose the .org or .net version (.com is always best though).
- Avoid any unnecessary words at the end IE benjbailey
actor.com
Moving on: After you purchase your plan, the next step is securing your domain name. If you purchased the monthly plan, you will buy your domain. If you purchased the yearly plan, it comes with a free domain.

Search the desired domain name, and if it’s available, it will allow you to proceed. Click the ‘Get It’ button.
Next, you will either purchase your domain or receive it for free with your plan.
Note: they may ask you if you want private registration. It’s optional and not necessary for what we’re doing here.
When you’re done purchasing or connecting your domain, you will navigate back to the main dashboard and see that your site is there with the domain connected.

Step 3: Filling In The Content & Publishing
To make changes to your site click ‘Site Actions’ and then click ‘Edit.’
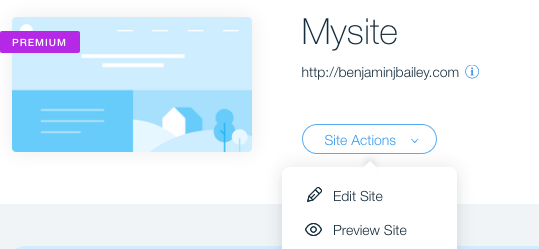
After you’re done replacing the current content with your own, you are now ready to publish the site, so it’s live to the world! Click ‘Publish’ in the upper right-hand corner.
Note: You will want to save progress along the way by pushing the save button that always lives in the upper righthand corner
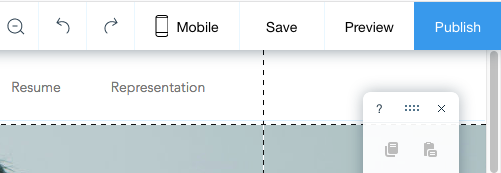
After publishing, you will then be able to view your website! Notice the custom domain appears as the web address (boxed in red).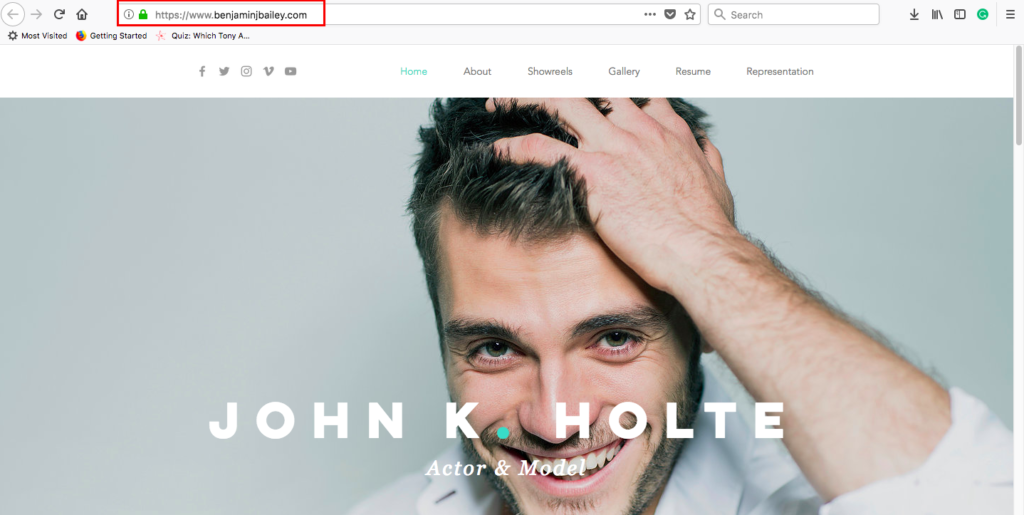
Congratulations! You have now set up your very own actor website, setting you apart from 90% of the competition. If you read the entire post first, make sure to start from the beginning by singing up with WIX HERE
But how do I actually use the website builder to fill in my content?
Wix offers many tutorials on how to use their intuitive drag-and-drop builder. Even so, it may be a little daunting to get going. That’s why we are offering a more in-depth step-by-step videos series on setting up and building your entire site. We will cover the steps discussed here and show you how to replace the information offered in the template, with your own material. We will also cover things like customizing the colors and feel of the site.
Part 2: What Kind Of Content Should My Acting Site Have?
When it comes to the types of content you should have on the site, I like to keep it clean and simple. Think of this as a first impression to anyone who visits. Things should be simple and visually pleasing but offer enough to give someone an idea of who you are, what you do, and what you’re capable of doing.
Let’s break the necessities into 5 main sections. Each of these should be a tab on your sites navigation menu. In most cases, each tab will link to a separate page on your site.

Question: What’s should be on the home page?
Answer: You should make one of the following sections discussed into the home page. I suggest the ‘About Me’ section. You could even do a variety of things such as a bio, a few pictures, recent blog posts, and a video. Having a little of everything on the home page is kind of like an overture of your entire website.
Section 1. About Me or ‘Bio’
The bio section should be a more informal way to get to know you when compared to the resume section (next up). You want to make this more personable, including things like where you grew up, how you fell in love with performing, and some specific examples of projects you’ve been a part of.
A great example of this is Broadway vet Bret Shuford: https://www.bretshuford.com/bio
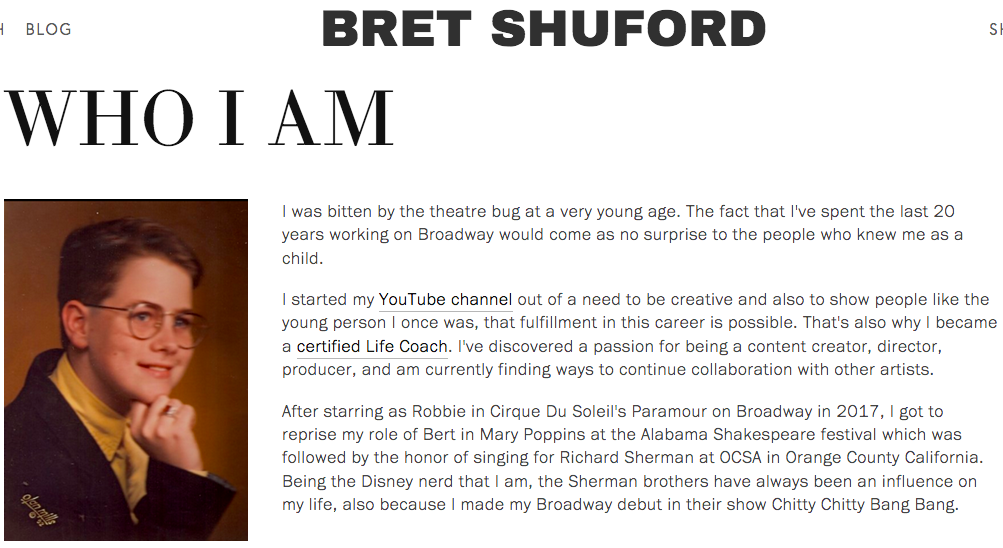
Bret does a great job mixing in personal details and professional accomplishments. He is also sure to link to things to help people who may be interested. In his bio alone he links to his YouTube channel, personal life coach brand, and his newsletter. This is a great utilization of getting what you can out of a single page.
Section 2. The Resume
Obviously, your resume page is the most important page on your site. Your resume page should include things downloadable headshots and a resume in PDF format. You also want to include a digital resume on the site itself, so it’s easy for producers and casting agents to skim and see if you’re a good fit. Then, they can use the download link to keep it on file.
Let’s take a look at Bret’s resume again here: https://www.bretshuford.com/actor
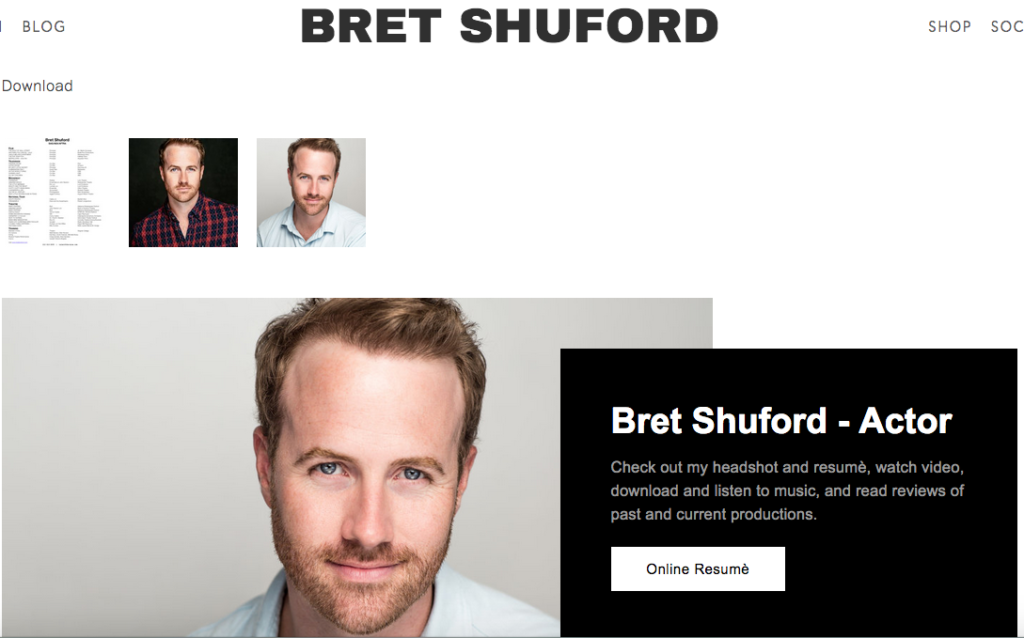
Bret makes it easy for someone to view his resume online or download it. He also includes a reel on his digital resume page which is a nice bonus of an online resume as opposed to a PDF alone.
RESOURCE: For more info on how to write an eye-catching actor resume GO HERE
Section 3. Video/Photos
Video: This one is pretty self-explanatory, but very important as well. Video is how the world consumes content, and video is a much better way to convey if you’re right for ‘the’ part. Video helps show your diversity and gets the casting team in the virtual audition room with you.
Even if you don’t have an official ‘Reel’ yet, just put whatever you have for now. Give them something to help get to know you as an actor. iPhones make great videos nowadays so no excuses.
I love the way Kim Greenberg organizes her videos HERE
Also, check out her entire site, it’s another GREAT example of a job well done.
Photos: As with video, photos help show you in action. They give a diverse perspective of the looks you can achieve and the characters you could potentially play. Let’s face it, looks have a lot to do with casting, and I don’t mean how attractive you are. Casting is a game of chemistry and having the perfect ‘Fit’ for a show. It’s like interior design… everyone has to ‘go with’ each other within the style of a show or job.
Photo tips: Try and include some lifestyle photos, headshots and photos of you in a production or on the job.
I love how Megan McGinnis organizes her projects into categories HERE
Pro Tip: You can put photos and videos under one category in your navigation menu by labeling it ‘Media’ and dropping those as categories underneath.
Section 4. Contact Section
Although your contact info will most likely be on the resume, having a dedicated section for it is recommended. Here you will include things like:
- Contact email (Phone not recommended)
- Agent Phone/Email (If Applicable)
- Where you are located: This doesn’t have to be the specific address, city and state would suffice.
Bret and Kim both have excellent contact page examples if you want to view them.
Section 5. News/Blog
While not entirely necessary, the news or blog section is a chance to brag about the projects you’ve done, and let people get to know you more. I’ve seen some actor websites with just news, some with just a blog, and others with both. It’s up to you, but I suggest having a blog too!
A blog will help you build loyal readers which is another term for fans! Letting someone in behind the scenes of your life can be a great way to create a personal brand of influence. Think about it; we love an inside scoop into people’s lives.

That’s A Wrap, Folks
You should think of your website as a tree with two different branches. One branch is for professional inquiries, and the other branch is for building a personal brand or fanbase. A blog can be an easy way to market yourself without feeling too… salesy. However, there is nothing wrong with self-promotion, but I’ll save that for another post.
I can’t force you to create your own actor website, but my goal here was to at least make it easier and to see the long-lasting benefits. It’s also a great way to document your journey as an actor and collect many memories of shows and gigs gone by.




2 Comments
Leave a ReplyOne Ping
Pingback:Do I need an actor website? Spoiler alert: Answer is No, But… | MySite for Actors